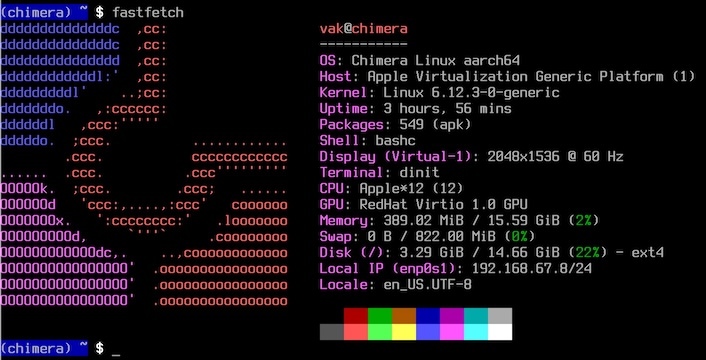
Just finished installing Chimera Linux as a virtual machine on my Macbook M2 Max. It's a beautiful OS, but getting it up and running felt like a time warp back to the early 90s. The installation process was as nostalgic as 386bsd, complete with a healthy dose of manual configuration. 😀 When installed, the system seems pretty stable and efficient, with 12 cores and 16 Gbytes of memory.

For full documentation, see chimera-linux.org/docs/installation.
(1) Download live image of Chimera Linux for ARM64 architecture:
Press '+', select Virtualize, then Linux.
Press 'Browse...' and choose ISO image you've downloaded.
Make disk size 16 Gbytes.
Start the VM and wait until "login:" prompt.
(3) Log in as root with password 'chimera'.
(4) Invoke 'cfdisk /dev/vda'.
Select label type 'gpt'.
(5) Choose 'New' to create a first partition.
Enter partition size '200M'.
Choose 'Type' to change partition type to 'EFI System'.
(6) Choose 'Free space' line.
Choose 'New' to create a second partition.
Enter partition size '15G'.
(7) Choose 'Free space' line.
Choose 'New' to create a third partition.
Use the rest of the disk, i.e. partition size '823M'.
Choose 'Type' to change partition type to 'Linux swap'.
(8) Choose 'Write' and enter 'yes'.
Then choose 'Quit'.
(9) Format EFI filesystem:
(24) Start the Chimera virtual machine again. It should boot from internal drive. You can log in as root with password you've set on step (19).
Now the system is complete and bootable. So let's configure it for our needs:
(1) Create a regular user with admin privileges:

For full documentation, see chimera-linux.org/docs/installation.
(1) Download live image of Chimera Linux for ARM64 architecture:
wget https://repo.chimera-linux.org/live/latest/chimera-linux-aarch64-LIVE-20241204-base.iso
(2) Create a virtual machine on UTM.Press '+', select Virtualize, then Linux.
Press 'Browse...' and choose ISO image you've downloaded.
Make disk size 16 Gbytes.
Start the VM and wait until "login:" prompt.
(3) Log in as root with password 'chimera'.
(4) Invoke 'cfdisk /dev/vda'.
Select label type 'gpt'.
(5) Choose 'New' to create a first partition.
Enter partition size '200M'.
Choose 'Type' to change partition type to 'EFI System'.
(6) Choose 'Free space' line.
Choose 'New' to create a second partition.
Enter partition size '15G'.
(7) Choose 'Free space' line.
Choose 'New' to create a third partition.
Use the rest of the disk, i.e. partition size '823M'.
Choose 'Type' to change partition type to 'Linux swap'.
(8) Choose 'Write' and enter 'yes'.
Then choose 'Quit'.
(9) Format EFI filesystem:
mkfs.vfat /dev/vda1
(10) Format root filesystem:
mkfs.ext4 /dev/vda2
(11) Format swap partition:
mkswap /dev/vda3
(12) Mount root filesystem:
    mkdir /media/root
    mount /dev/vda2 /media/root
    chmod 755 /media/root
(13) Mount EFI partition:
    mkdir -p /media/root/boot/efi
    mount /dev/vda1 /media/root/boot/efi
(14) Install packages over network:
chimera-bootstrap /media/root
(15) Update the installed filesystem:
    chimera-chroot /media/root
    apk update
    apk upgrade --available
(16) Install Linux kernel:
apk add linux-stable
(17) Enable swap:
swapon /dev/vda3
(17) Generate fstab:
genfstab / >> /etc/fstab
(18) Install other packages:
apk add bash vim git
(19) Set root password:
passwd root
(20) Refresh initramfs image:
update-initramfs -c -k all
(21) Install bootloader:
    apk add grub-arm64-efi
    grub-install /dev/vda
    update-grub
(22) Shut down.
    exit
    sync
    poweroff
(23) Disable ISO image in UTM configuration.(24) Start the Chimera virtual machine again. It should boot from internal drive. You can log in as root with password you've set on step (19).
Now the system is complete and bootable. So let's configure it for our needs:
(1) Create a regular user with admin privileges:
    useradd vak
    passwd vak
    usermod -a -G wheel,kvm vak
(2) Set hostname:
echo chimera > /etc/hostname
(3) Set time zone:
ln -sf /usr/share/zoneinfo/America/Los_Angeles /etc/localtime
(4) Enable system logging:
dinitctl enable syslog-ng
(5) Enable remote login:
    apk add openssh
    dinitctl enable sshd
(6) In case you need GUI, let's install the graphical interface:
    apk add gnome
    dinitctl enable gdm
For the rest of configuration options see chimera-linux.org/docs/configuration/post-installation.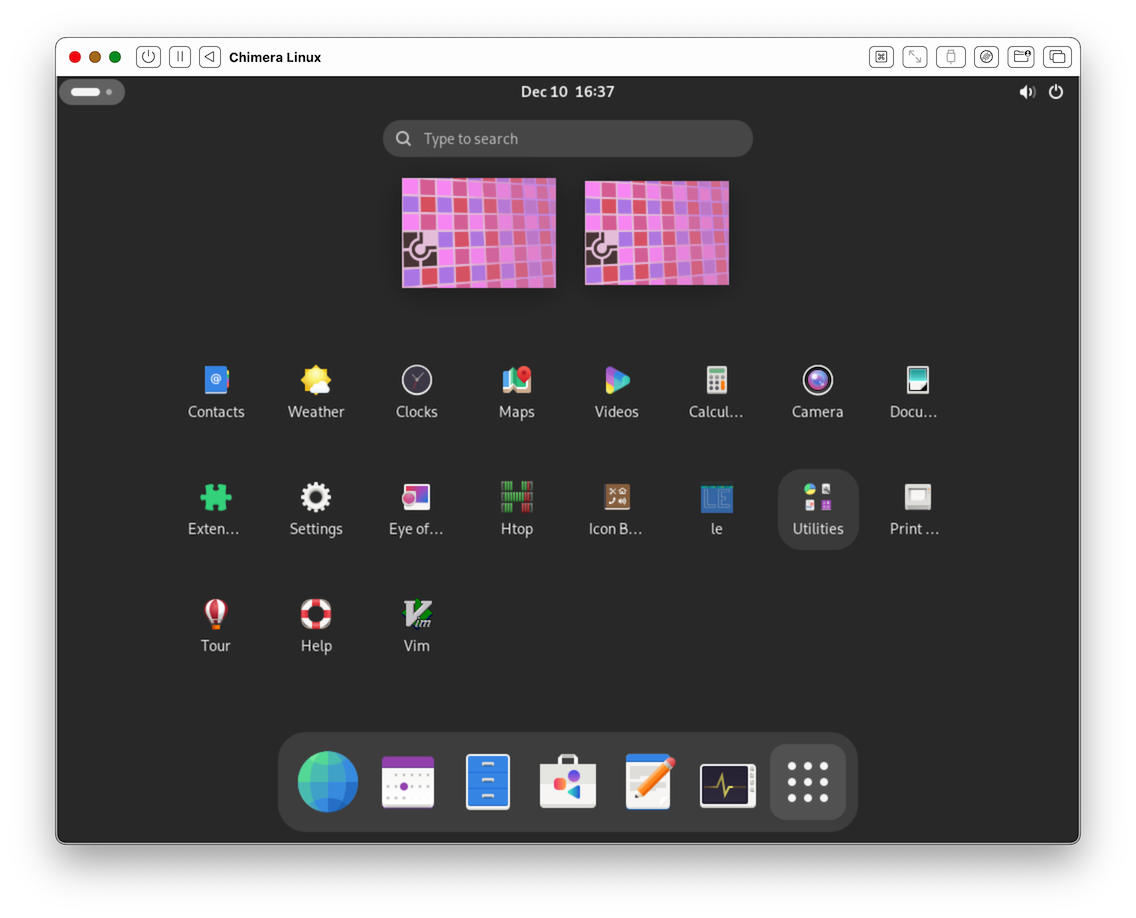

no subject
Date: 2024-12-11 01:58 (UTC)no subject
Date: 2024-12-11 04:00 (UTC)no subject
Date: 2024-12-12 07:41 (UTC)no subject
Date: 2024-12-12 08:21 (UTC)no subject
Date: 2024-12-12 08:51 (UTC)no subject
Date: 2024-12-12 09:26 (UTC)